

The first time I made cake pops, I was pretty convinced that I would never make them again. It seemed to take forever. There are so many steps. To make matters worse, I was making peppermint chocolate cake pops, so after I dipped each one in white chocolate, I waited 30 seconds for it to set before rolling it in crushed candy canes. That added a lot more time than I’d anticipated.
However, if you read this blog regularly, you know that I have actually made cake pops several times since my first attempt. They turned out to be so delicious and popular that I couldn’t help but try making them again. Each time, I discovered a new way to make it easier.
I’ve had a lot of people ask me how I make cake pops, especially without a cake pop maker. I’m not a huge believer in unitasker kitchen appliances, plus a cake pop maker just shapes cake into balls. In my opinion, a true cake pop is cake and frosting combined into a fudgy, moist truffle. I’m not sure that Bakerella (the creator of cake pops) would want it any other way.
Odds are, you have at least one or more of these tools in your kitchen already. Put them to use and make some cake pops more easily!
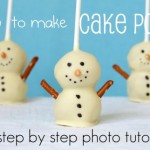
(Need some recipe inspiration? I’ve also made snowmen cake pops, heart shaped cake pops, salted caramel cake pops, cheesecake pops and whoopie pie pops. Plus, I’ll be posting a St. Patrick’s Day inspired cake pop (the one pictured below) in a few days!)
1. Crock-Pot Little Dipper

The Little Dipper is a tiny Crock-Pot often used for dips and sauces. It only has 1 setting, warm, and it’s perfect for melting chocolate or candy melts to coat cake pops. I don’t own a microwave, so I usually melt chocolate in a double boiler on the stove top. This sometimes makes the chocolate or candy melts too hot, which makes the cake pops fall apart when dipped. Even if you have a microwave, the Little Dipper will melt the coating for you with no effort and to the perfect temperature.
It will take around 15-20 minutes to melt. You can stir occasionally or wait until the end to stir. Don’t leave it plugged in if you’re not going to be dipping the pops right away though – it might start burning around the edges.

2. Cookie cutters

Usually when people make shaped cake pops, they shape them each individually by hand. It’s daunting enough to roll round cake pops by hand, and making each into a shape seems even worse. So when I made heart shaped cake pops, I found an easier way: push the cake pop dough into a wide, shallow baking dish and use a cookie cutter to cut out the shapes. Easy peasy!
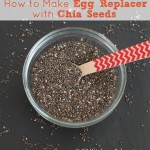
3. Food processor (or blender)


I thought everyone knew this one, until I saw someone at a bakery using a cheese grater to break up the cake. Seriously?! You can also use your hands to break up the cake, but it’s so much easier and faster to crumble a cake by putting in a food processor. I know that not everyone owns a food processor, so I tried out this method in my blender too. It works almost as well, you just have to use smaller pieces of cake at a time. There’s no easier way to break up a cake into even crumbs with no chunks.
4. Cookie scoop

I use this medium cookie scoop to make evenly sized cake pops. It’s pretty easy: scoop up the cake pop batter, push off the excess with your finger, and release onto your clean, slightly moistened hands (making your hands a little wet prevents the cake from sticking). Then roll it into a ball. Done!

5. Colander

I saw this idea on Pinterest. Can’t find any styrofoam? Use a colander! Only some of the holes on mine fit the lollipop sticks, but it was a great solution for letting the cake pops dry. I bought some styrofoam at Michael’s (and felt a little silly paying money for something you can get for free) and it was immediately covered in sprinkles and flecks of melted chocolate. This can be easily cleaned if that happens and you probably already have one in your kitchen cabinet.
 For step by step photos on how to make cake pops, click here.

104 Comments on 5 Tricks to Make Cake Pops More Easily
4Pingbacks & Trackbacks on 5 Tricks to Make Cake Pops More Easily
-
[…] the holiday. I actually meant to post this earlier this week, but instead I put together a list of tricks to make cake pops more easily (which you should read before you try making […]
-
[…] couple of weeks ago I posted my 5 tricks to make cake pops more easily – ways I’ve found to cut down on time and frustration by using kitchen tools I already […]
-
[…] Cake Pop Stand Alternative for Drying […]
-
[…] Cake Pop Stand Alternative for Drying […]
Karis' Kitchen
March 5, 2012 at 12:04 pm (12 years ago)I felt the exact same way the first time I made cake pops. While I still don’t enjoy making them, I will say the effort is worth it. A couple additional tips – I find it helpful to only remove half of the cake balls from the freezer at a time, because they tend to slide down the sticks if they soften too much. Also, Wilton’s 3″x4″ treat bags work well to cover each cake pop individually (tied around the lollipop stick).
Stephanie
March 5, 2012 at 1:33 pm (12 years ago)@Karis’ Kitchen – I’m glad I’m not the only one who feels that way 🙂 Thanks for the great tips! I’ve found the same thing about removing them from the freezer and it’s nice to know which bags to buy.
Kitchen Appliances
March 5, 2012 at 2:39 pm (12 years ago)Brilliant article, i recently just bought some new kitchen appliances from http://www.gio-espresso.co.uk and http://www.gio-kitchen.co.uk i think im gonna try some of them out with the help of this article. great read.
Laura@MotherWouldKnow
March 6, 2012 at 6:54 am (12 years ago)Wait, there is such a thing as a “cake pop maker?” You’ve got to be kidding. Loved your easy ideas 2-5. (Tiny crock pot strikes me as ridiculous, but I guess if you make tons of cake pops it’s worthwhile.) I’ve been obsessed with idea of making cake pops, though I haven’t tried them yet. Now maybe I will, with your hints.
Stephanie
March 6, 2012 at 7:03 am (12 years ago)@Laura – yes, there are cake pops makers, molds, etc. People have really taken advantage of the trend! A batch of cake pops make around 50, and I’ve had issues with hot coating making the cake pops fall apart, so I’ve found the Little Dipper to work really well. If you have a microwave, that might work just as well though. I hope you try out cake pops soon – they’re a lot of work but oh so yummy!
Melissa Roberts
December 1, 2017 at 3:09 pm (6 years ago)Love my little crock pot & use it all the time. It works perfectly for dips too… place in the center of chips and viola!
Lacy @ NYCityEats
March 6, 2012 at 8:42 am (12 years ago)Great helpful tips! Perfect for St Patty’s Day! Your little snowmen are adorable!
Lacy @ NYCityEats recently posted Boozy Apple Pear Tart
Kiri W.
March 6, 2012 at 11:03 am (12 years ago)Awesome advice – I have shied away from cake pops for just these reasons. Thank you! 🙂
Kiri W. recently posted Dulcia Domestica – Ancient Roman Housemade Dessert Of Pine Nut Stuffed Dates
Emily @ Life on Food
March 6, 2012 at 11:39 am (12 years ago)Great tips. I my opinion has always been it is way too much effort with all of those steps so I have never made them myself. I although I have gone out and bought all of the ingredients just in case. I love your ways to make it easier with no extra gadgets needed.
Emily @ Life on Food recently posted Saltwater Cowboy
Leslie
March 6, 2012 at 12:02 pm (12 years ago)I haven’t made cake pops because every recipe I have seen made it look like way too much work. I got a crock pot for Christmas that had the Little Dipper included as a bonus, never thought to use it for melting chocolate…. we use it for fondue date night!
Lauren at Keep It Sweet
March 6, 2012 at 12:40 pm (12 years ago)What a helpful post! I’ve actually never made cake pops because I’m sure it would take me forever. This is great, though!
Choc Chip Uru
March 6, 2012 at 1:59 pm (12 years ago)There are some great tips and tricks here – maybe I won’t be so intimidated anymore 😀
Thanks!
Cheers
Choc Chip Uru
Latest: Lemon Meringue Tart
Choc Chip Uru recently posted Traditions Of March #1
Jessica
March 6, 2012 at 2:05 pm (12 years ago)I have been making cake pops for years and I remember when I first started too. I swore up and down I would never do this again, until I started learning the tricks. One thing I’ve recently started doing is using my kitchen aid mixer to break up the cake. Once it’s crumbled, I go ahead and scoop some of the frosting right in and let it mix with the mixer. I haven’t had any issues doing it that way so far and it’s cut down on lots of time.
Jessica recently posted Checking my list…
Markita
June 16, 2017 at 2:09 pm (7 years ago)I use my Kitch aid Mixer as well and it breaks it down with no chunks
JOELLE
August 5, 2018 at 2:29 pm (6 years ago)Hi Jessica,
Do you know if I could mold the cake pop batter around a lollipop then dip them? Thanks
Joelle
Lilly
March 6, 2012 at 2:26 pm (12 years ago)I’m so happy i’ve found your blog! Your tricks are very useful! Now I need to try and make my very first cake pops!
Sandra
March 7, 2012 at 7:28 am (12 years ago)I took a look at the colander and thought, talk about not seeing the forest for the trees. Excellent idea, thank you. When I crumble the cake, I put it in a gallon size zippered bag and crush it. No mess this way.
Sandra recently posted Strawberry Cheesecake
Miss Kitty
March 8, 2012 at 6:42 am (12 years ago)I just at a potentioal customer ask me if I make cake pops.. sooo with these tips I’m diving in. I already wrote out a whole list of ideas.
Thank you so much..
Heather Sipe aka Miss Kitty
Erin @ Dinners, Dishes, and Desserts
March 9, 2012 at 1:34 pm (12 years ago)Great tips! I love the last one – the colander is such a great idea!
Sherry
March 9, 2012 at 3:32 pm (12 years ago)Love the tips, I am in the process of making a cake pop stand. I picked up a small milking stool at Michaels, I am going to drill double size holes in it to hold both widths of pop sticks.
I will then paint it so it is washable, I am so done with foam and cardboard stands.
I will be doing a post with step by step instructions in the future. I will let you know how it turns out.
(I only have 1 post up as I have been in the process of changing hosts, and well the process is going slow…)
The Little Dipper tiny Crock-Pot is fantastic, it was only $12.00 and is ment to keep dips and spreads warm so you can use it tonight for nacho cheese sauce and tomorrow for melting chocolate, brillant.
Sherry recently posted Welcome to Sugar N Spice Kitchen!
LISA B.
June 8, 2016 at 12:46 pm (8 years ago)I made a pop stand out of 2 pieces of peg board and long bolts with nuts and 1″ washers threaded onto the bolts to space the boards about 2″ apart. The long bolts, washers and nuts make the spacing adjustable. I used rounded nut caps on the tops and the bottoms so that the display has rounded feet and no sharp edges. My stand is 24 inches square. Due to its size, I added a fifth bolt “leg” in the center of the boards so that it would not sag in the middle. I painted it white and glued trim molding so that I can use it as a display also. When I’m using it to assemble cake pops, I simply cover it in plastic wrap that I have taped well at the corners. I have used it to display cake pops, and dipped oreo pops as well as large rainbow lollipops that I once used at a party as escorts cards. It disassembles easily for storage also. When looking for a solution to a problem never overlook the hardware store!
Glynda
June 16, 2016 at 11:48 am (8 years ago)Lisa B. – I would love to see a picture of your end product! I’m finding it hard to visualize what this cake pop stand looks like. Thanks for your help!
Norma
March 12, 2012 at 3:54 pm (12 years ago)Thank you so much for the tips !
Andrea Sparks
August 23, 2019 at 6:14 am (5 years ago)I use a styrofoam block. I cover it with tin foil and then just push the pop through the foil and into the styrofoam. The foil is removed and thrown away and you are ready for the next time you make your cake balls.
Beck
March 15, 2012 at 9:50 pm (12 years ago)How do you get the lollipop sticks to stay in the cake pop? For me they always come off! =( I use a cake pop maker and it is amazing!! Very delicious but sticks are hard to keep in the pop.
Stephanie
March 16, 2012 at 10:58 am (12 years ago)@Beck – I dip the tip of the lollipop stick in the melted coating (chocolate or candy melts). Then stick it almost all the way through a slightly frozen cake pop. Next week I’ll be posting a step by step photo tutorial on making cake pops that will address lots of questions like this.
Caitlin
March 19, 2012 at 11:16 am (12 years ago)the colander idea is perfect! I hate paying for Styrofoam as well and tried searching for something in my kitchen to use with no luck. One other trick i do is put some undipped, but rolled cake pops in the freezer and save them for when I’m ready to make just a couple for a certain occasion. Helps cut down a lot of time as well!
Stephanie
March 19, 2012 at 5:02 pm (12 years ago)@Caitlin – isn’t that a great idea! When I saw it on Pinterest, I was like, “duh!” I have some undipped cake pops in my freezer and I’ve found that they make a great snack straight out of the freezer. They’re not rock hard but actually the perfect texture, surprisingly.
Kita
March 19, 2012 at 6:49 pm (12 years ago)Every time I try cake pops its a total fail! Thank you for the tips – I love the scoop idea. Hopefully next time I will do bit better than my last attempt.
Kita recently posted Fajita Stew
Stephanie
March 19, 2012 at 6:55 pm (12 years ago)@Kita – I hope it goes better next time! At the end of the week, I’m going to post a step-by-step photo tutorial that will help you even more.
Beth Marin
March 24, 2012 at 6:16 am (12 years ago)Awesome tips! I just made my second batch of cake pops yesterday and found that it went much smoother than it had on my first attempt.
As I was crumbling the cake by hand, I wondered if the food processor would work as a solution for this step, so I am really excited to see it does.
I have not tried the shaped pops, but I am wondering if you chill the cake-frosting mixture in the fridge after you smoosh it into a pan and before working with the cookie cutters?
Thanks for sharing your tips and tricks!
Stephanie
March 25, 2012 at 9:25 am (12 years ago)@Beth Martin – I always use a food processor – it’s so much faster and easier! For shaped pops, I smooshed the mixture into a pan, cut out the shapes and then froze those. You have to use a relatively firm cake (I tried this with a really moist carrot cake and it was too mushy).
Bronagh
May 10, 2012 at 1:50 pm (12 years ago)Was wondering could anyone advise me what candy melts to use – made a batch yday and melted the candy melts in a double boiler and it was a disaster – wasted all the melts.
Stephanie
May 10, 2012 at 2:50 pm (12 years ago)@Bronagh – what do you mean when you say it was a disaster? If they separated and became lumpy, you need to reduce the heat and melt them more slowly. You don’t want them to be really hot anyway, because it will be too hot for the cake pops when you coat them. What kind of candy melts were you using? I’ve used the Wilton ones and they work perfectly for cake pops.
built in fridge
June 1, 2012 at 6:24 pm (12 years ago)Great helpful tips! Perfect for St Patty’s Day! Your little snowmen are adorable!
Liyana
July 4, 2012 at 6:41 am (12 years ago)Great tips. I’ve made cake pop couple of time and it’s frustrating. I just don’t know what went wrong. I follow all the steps. Successfully coated it with compound chocolate, they dipped and set just fine. But after 30 minutes or so, the cake pops will form condensation at room temperature and start slid down the stick one by one.
Luke
August 12, 2012 at 8:05 am (12 years ago)Thanks for the Cake Pop tips!
Last time I made them they seems to fall apart when dipping and slide down the lollipop stick, I suppose the candy melts must of been too hot!
Thanks you once again 🙂
Grace
August 29, 2012 at 10:41 pm (12 years ago)http://thesecretbaker.com has Cake Pop kits that comes with everything to make that one kit!
Mindy
September 13, 2012 at 8:46 pm (12 years ago)Thanks for sharing the tips. I didn’t want to go out and buy the cake pop maker, seemed silly to me. One trick I have learned while making cake balls, is after you crumble your cake wether it be by hand, blender or food processor, stir in a container of your favorite frosting or sticking to theme. It will also help keep form of the balls and add more taste.
Vel
September 13, 2012 at 9:36 pm (12 years ago)I love these blogs and sharing of tips! I learn so much from my fellow kitchen adventurers.
Here are a few things I have come up with over time: Your mileage may vary.
A few things to help the task of cake pop making not seem like a gaint project: You can bake the cake ahead if time. You do not have to make pops out of the entire batch of cake. You can use part of the batter to make cupcakes or a single layer cake, you can freeze half or 3/4 of the cake to use a different day. Say you don’t want 48 pops, only a dozen. You can break the cake up into four equal portions and freeze the all but one portion. The next time you want to make pops, just pull out one or more pieces and defrost.
A tip for getting your pops the same size and to get the number of pops you want ( without having to go back and pinch some dough from each pop because you need x number more.) dump your bowl of dough ( cake and frosting) on to a cutting board and shape into a one inch thick rectangle. Then get a good sized knife and cut the dough into a grid of even size little squares or rectangles. (A whole cake mix will make 48 perfectly sized pops). Then roll them into balls. To prevent the dough from becoming too warm to work with, only have a portion of the cut dough out of the fridge at a time.
Remember, this doesn’t have to be done in one day. You can bake one weekend, mx the dough another day, cut into even sized portions another day etc.
To help “anchor” the pop to the stick: I first use a stick to poke holes, no more than half way through the pop balls. Put them in the fridge while you melt the candy coating. Secondly, I dip the tips of the sticks into the melted candy melts and insert one into each pop and put them back in the fridge.
Have your sprinkles or anything else you are going to put on the pops ready to go. Have your stand for the finished pops ready.
Take a dozen or so pops out of the fridge at a time. Dip the pop into the melted candy coating . I have never had success dunking the entire pop straight down into the coating. Ever. I hold the stick/pop at an angle over the coating and kind of roll them w/o completely dunking. I use an off-set spatula at the base of the pop to guide/get the excess coating to drip back into the pop. I don’t handle them too much or tempt fate by holding the pop upside down. Do the sprinkles or whatever else you want to soon after coating: too late and the sprinkles won’t stick. Too soon ( before the coating has set much) and any garnishment that may weigh a bit will slide off
It has been my experience that if the uncoated pop is too cold when the warm melted coating is applied, the coating cracks or they do that “sweating” thing. I want the pops cold and the coating melted but if the temp difference is too great, I’m not happy with the finished product.
All of our kitchens are different, our candy coating may be different, our climate different, our equipment is different. What works for me may not work for someone else. I have learned so much from our little community. And I learn more and get new ideas to try out all the time.
Thank you all so much, Vel
Missvbakes@ymail.com
lydia bruno
September 28, 2016 at 4:57 pm (8 years ago)wow excellent on the cake pops! this is so informative. thanks for taking the time to explain and share <3
Daxcoop
September 17, 2012 at 8:14 pm (12 years ago)Go to thesecretbaker.com !!! They have complete kits and great illustrated instructions! Their kits have everything you need to complete your project.
No more running around to 3 different stores to get everything you need!!!
Parul
September 18, 2012 at 4:34 am (12 years ago)Thank you for the tips. The last one was amazing.
Stephanie
September 20, 2012 at 9:10 pm (12 years ago)@Parul – I love that last one too. It was one of those “Duh! Why didn’t I think of that?!” moments for me.
Vel
September 20, 2012 at 11:52 pm (12 years ago)Praul and Stephani. You both say the post above yours and below mine by Daxcoop was most helpful. I went to the site Daxcoop said to visit but I can’t find the illustrations mentioned, just the kits. Can you direct me to where the illustrations and tips are?
Thanks
Vel
Missvbakes@ymail.com
Adi Wish
October 4, 2012 at 12:15 am (12 years ago)Thanks for the great tips… I am now on the hunt for a little dipper in Australia!! Another great idea is all those cake-offcuts for frequent bakers… I keep every single slice of cake trimming when I bake… it all goes into a airtight box in my freezer… when its full its cake pop time 😀 I thaw it out and have almost instant crumbs as the freezer dries it out slightly making it crumble easily…. I akso have a left-over frosting box in the freezer for those last 1/3 of a cup left-over buttercreams… its starting to look very pretty and colorful LOL
Stephanie
October 4, 2012 at 4:33 pm (12 years ago)@Adi Wish – great idea about freezing the odds and ends after baking cakes and making frosting. Thanks for sharing!
Diane
October 8, 2012 at 10:07 am (12 years ago)I liked your ideas, especially the colander to hold them. I just recently made cake pops for the first time, and while they were delicious, it was time consuming. The biggest problem I had was getting a all around smooth chocolate finish, and not having the chocolate drip down the stick. Any helpful hints?
Stephanie
October 8, 2012 at 2:37 pm (12 years ago)@Diane – they are very time consuming. I try to dip them quickly (and only once) for a smooth finish, and then hold the pop sideways, tapping it gently until all the excess chocolate drips off. That way, it won’t drip down the stick.
Kendra
October 12, 2012 at 5:07 pm (12 years ago)The colander idea is brilliant! You just saved me some frustration…
Kim Barnes
October 17, 2012 at 8:08 pm (12 years ago)Good evening, I am trying to figure out how you get your chocolate so smooth on your pops. Please advise. Mine do not turn out very presentable.
Stephanie
October 19, 2012 at 4:09 pm (12 years ago)@Kim – see my step by step post on how to make cake pops. I’m not sure what is going wrong with yours without being there, but here are some tips: only dip the cake pops once and do it quickly (dip the whole thing in at once and quickly pull it out, then let the excess drip off). Don’t use the chocolate/candy melts if they’re super hot (if you use the microwave, be careful and let the chocolate cool if it feels really hot to the touch).
manju
October 24, 2012 at 11:14 am (12 years ago)Loved the colander idea…why din’t i find this out before I made my cake pops, i had to leave them upside down with stick up to rest and I dint have styrofoam!
manju recently posted Giveaway – a Checkerboard Cake pan set !
Irish Lola
November 6, 2012 at 10:24 pm (11 years ago)I see all the comments about cake pops but do you have any advice on cake balls? I tried to make some for the first time today and it was a disaster. I used Wiltons candy melts and used two spoons (one slotted) but I could not get all the chocolate off for a nice clean coating. When I tried to roll them in the sprinkles it was just a big mess. Large amounts of chocolate also pool and the bottom as the cool. Any suggestions would be very welcomed!!! 🙁
Irish Lola
November 6, 2012 at 10:29 pm (11 years ago)Is there a way to thin out the candy coating so it looks smoother and it is not so deformed looking after I coat them with sprinkles?
Stephanie
November 6, 2012 at 11:43 pm (11 years ago)Irish Lola, you can thin out candy coating with canola oil. Add a little at a time and mix thoroughly. You only want to do one thin layer of coating. Then put them onto a surface and sprinkle the decorations on top (if you roll them around when the coating is still wet, it will clump up). Really, cake balls are the same as pops, just without the sticks, so you can follow most of the tips and directions for them. Good luck!
Pamela
February 23, 2019 at 6:07 am (5 years ago)Try coconut oil instead of canola oil. It tastes better, and is healthier, although you have to actually research fats/oils to get to that truth. 😉
Rose
November 12, 2012 at 2:23 pm (11 years ago)Great ideas! I don’t know how many times I’ve picked up – and passed up- a Little Dipper at Goodwill, but not again – so much easier than trying to regulate a small pan on the stovetop. I love the blender and colander ideas especially. Thanks for making my venture into round cake pops so much easier…and frugal.
Rose recently posted The Cake Mix Doctor returns to Cincinnati, this time with gluten-free dinners
Jade
November 24, 2012 at 11:19 am (11 years ago)I am SO glad to finally find someone who agrees with me about cake pop makers! The whole draw to cake pops for me is the fudgey texture 🙂 Thanks for the tips…I think I need one of those little crock pots 😀
Jade recently posted Thankful Thursday!
Julie
November 29, 2012 at 7:24 am (11 years ago)Great tips! Making for the first time and these are great. I hate a tiny crock pot I’ve never used and forgot I had! And the colander idea is so clever! Thanks 🙂
Gill
November 30, 2012 at 3:03 pm (11 years ago)instead of a collinder i bought dry-foam you use for fake flowers and covered it in wrapping paper or any designed paper and it makes them great for all occasions
Gill recently posted Mexican Hot Chocolate Whoopie Pies
Esther Joseph
December 1, 2012 at 4:42 am (11 years ago)I love all your ideas I bought a meat ball shaper so the ball will be all the same side I was actually weighing each ball which was ridicules,and time consuming.
Priya Sahasranaman
January 16, 2013 at 7:17 pm (11 years ago)I loved your ideas – went ahead and bought myself a meat baller, used the food processor and the colander – certainly made it easy! Thanks!!
Anita
February 11, 2013 at 4:08 pm (11 years ago)I purchased Wilton 6″ long cookie pop sticks and an ordered a Nordicware cake pop stand on line. It is a tiered stand that holds up to 48 pops. The only problem is that the diameter of the Wilton sticks is too large to fit into the holes in the pop stand. Do you know of another brand that that are smaller in diameter or where I might look to find them?
Stephanie Nuccitelli
February 11, 2013 at 5:14 pm (11 years ago)Anita, I found some sticks made by Nordicware on Amazon. Hopefully those will fit since they’re from the same brand. Good luck!
Anita
February 12, 2013 at 12:29 pm (11 years ago)Stephanie,
Thank you for your quick reply. I found 2 or 3 different brands on Amazon that fit my need.
Alycia
March 25, 2013 at 11:17 am (11 years ago)Hi. We are so opposite b/c I love to cook & don’t love to bake. However, your tips will make my cake poppers much better. Thank you so much.
Melanie
April 23, 2013 at 6:31 am (11 years ago)Fab tips on how o successfully make cakepops I have recently started making them and at first found them too much hassle but after abit of practice I now love doing them and there veryopular with my customers
toni
April 24, 2013 at 8:49 am (11 years ago)Wow wish i read this a week ago. I made them for a baby shower and they were well liked…..one of the questions for a prize at the shower was how long do you think it took me to make these…lol…how insane….i was going crazy on how long it took…but i will try them again now. at first i had the same comment as others,,,,this will be the first and last time.
Joe Tritschler
May 12, 2013 at 6:27 am (11 years ago)One of the best things I learned while making cake pops was dipping the end of the stick into chocolate, candy melts or a stiff frosting before placing inside the uncoated cake pops.
Once in, let them sit, for about 10-15 mins to let the stick harden in the ball. Also, refrigerating or freezing the cake pops before dipping them also helps the dipping process and secures the stick further.
TIFFANY
June 13, 2013 at 11:42 am (11 years ago)I don’t think anyone mentioned to put about a tablespoon of shortening in with a bag of the candy melts. This makes the melted candy much smoother and easier to dip balls with out pulling the stick off, and a more professional looking finish. They will take a little longer to dry completely and I have read that they are not quite as hard after they dry but honestly I haven’t noticed much of a difference.
TIFFANY
June 13, 2013 at 11:45 am (11 years ago)Another tip, make the cake pops over a few days: make cake one evening, crumble and add frosting and roll another, save dipping and decorating for another day.
Veronica
June 18, 2013 at 6:30 pm (11 years ago)I actually went and bought the Crock Pot Little Dipper and followed all the instructions. I stirred it in 5 minute intervals..it burnt some of the edges and didn’t properly melt the discs at all.
Not meaning to be negative about the key, it’s interesting, it just didn’t work for me, plus I wasted a bunch of money on candy melts and the Little Dipper
Veronica recently posted Baked Macaroni and Cheese with Panko
Stephanie Nuccitelli
June 19, 2013 at 3:13 pm (11 years ago)Veronica, I’m sorry to hear that! Maybe your Little Dipper runs at a higher heat than mine. You could try stirring more often and unplugging it after everything melts so it doesn’t burn.
Melissa
July 2, 2013 at 4:43 pm (11 years ago)Hi,
I don’t like to use candy melts due to the content, but do most frostings work OK for dipping? Thanks~
Stephanie Nuccitelli
July 5, 2013 at 12:55 pm (11 years ago)Melissa, frosting won’t be hard enough for coating a cake ball, but you can use melted chocolate.
Danielle
July 4, 2013 at 8:13 pm (11 years ago)So many amazing tips! I’m hosting a candy molds & cake pop party today and I’d love for you to join: http://www.framedfrosting.com/2013/07/candy-molds-cake-pops-craft-with-what.html
Vicki Branham
July 24, 2013 at 2:39 pm (11 years ago)where can i get a recipe for the cake pops?
Doreen
November 4, 2013 at 6:39 pm (10 years ago)I bought Wilton cake pop cake pans ( thought u have too) n used box mix for a youth party n the pop sticks came right out or when I turned them upside down to stick in foam to dry they pushed right through? Did same thing when didn’t dip too. I already bought 4 pans because I usually have to make at least 100 n up. Any suggestions on using pans w box mix?
SUZANNE
November 27, 2013 at 11:50 am (10 years ago)Just started yesterday to make cake pops. I have the cake mix with icing on the sticks not decorated in the freezer in a container. Will they be alright like that until I decorate within two weeks? any tip s for taking them out ie time and decorating them…. many thanks
Stephanie Nuccitelli
December 1, 2013 at 4:19 pm (10 years ago)Suzanne, they should be fine. I don’t usually freeze them on the sticks (I put them in after freezing and before coating), so I don’t know if they will stay on or not. I would let them thaw for 15-20 mins before dipping. See my guide to making cake pops (including links to different decorating ideas) here.
Nadina
January 4, 2014 at 9:00 am (10 years ago)Hello Stephanie,
I ended up on this page via your homemade salted caramel mocha recipe which looks yummilicious and that I’m going to try in a minute as a nice afternoon drink 🙂
I just wanted to say, colander to let the cake pops dry: GENIUS! Although you need the right type of colander too though! (I have one with words on it…not useful!) Anyway, thanks for finding that one out on Pinterest and sharing it with us! First time I’ve been to your website today and certainly not last one, I like it already ^_^
Nadina recently posted Choux Michalak – chou remplis de crémeux aux agrumes et nappés…
Stephanie Saunders
January 4, 2014 at 8:35 pm (10 years ago)Nadina, so glad you enjoyed this post and the salted caramel mocha recipe! I hope you come back and enjoy some more posts. Follow me on Facebook to find out about new recipes and posts.
Tiffany
January 9, 2014 at 7:30 pm (10 years ago)Great tips! Love the colander idea. I just made my first batch of cake pops. I was trying to make “Olaf” the snow man from FROZEN and while the cake pops tasted amazing (half the battle, I guess), they looked hideous! I ended up crying and my husband tried to salvage them. We ended up laughing in the end because they looked like horror snowmen. I will use some of your ideas for the next batch. I’ve loved having two bite snacks in my refrigerator so it is definitely worth it!
Roller Scrapper
April 6, 2014 at 12:16 pm (10 years ago)Thank you so much for the crock pot little dipper idea! I have one that I got with my regular crock pot at Costco that rarely gets used. I made some cake pops 5 years ago and it was really difficult, I was mixing in oil to help with the overly thick consistency, butthis worked perfectly! I see more dipped items in my future!
Roller Scrapper recently posted Vanellope von Schweetz Halloween costume
Lori The Cupcake Lady
April 8, 2014 at 7:14 pm (10 years ago)I’m trying these soon. If I use one box of cake mix, do I use one can of frosting to blend in the crumbled cake mixture?
Stephanie Saunders
April 8, 2014 at 7:18 pm (10 years ago)Yes, use one can of store bought frosting to one box of cake mix.
Stacy G
April 18, 2014 at 3:42 pm (10 years ago)What do you mix in your crumpled cake to make it stick together to roll them?
Stephanie Saunders
May 4, 2014 at 6:39 pm (10 years ago)Stacy, you mixed cake crumbs with frosting. Click here to see a step by step cake pop tutorial.
Mariz
June 4, 2014 at 2:04 am (10 years ago)thank you for the crock pot idea! it’ll save me time! 😀 I don’t really do cake pops the manual way like you did though. It’s a little to messy for me. I use a silicone mould to shape my cake balls. My keetzen mould ensures I get evenly round cake pops each time without getting my hands dirty! I got my silicone mould here if you guys are interested 🙂 http://amzn.to/1kKwVkw
Lizzy
October 21, 2014 at 1:16 pm (10 years ago)I have never made cake pops, but am getting ready to try for the first time and have been Googling my butt off, looking for advice. Let me say, you are an effing genius! So many of your tips are going to make this a lot easier on me!
Stephanie Saunders
October 25, 2014 at 7:02 pm (10 years ago)I’m so happy to hear that, Lizzy! Good luck with your first batch of cake pops! I’d love to see a photo – feel free to post one to fb.com/52kitchenadventures
Vicki
November 9, 2015 at 6:53 pm (8 years ago)I did buy a sheet of styrofoam to let my pops set in but I covered it in foil and then just remove the foil and replace it when it gets too messy or dirty and keep reusing the styrofoam
katie
May 28, 2016 at 5:58 pm (8 years ago)I am making cake pops but I can not get candy melts can I use the left over cake frosting instead?
LISA B.
June 8, 2016 at 12:29 pm (8 years ago)An upside down eggs carton is another way to dry your pops. Just turn your egg carton upside down and push one pop through each egg compartment.
momof4
July 21, 2016 at 6:33 am (8 years ago)Thanks I learned a lot of tricks I did not know!
Myranda
August 12, 2016 at 10:18 pm (8 years ago)i am attempting to make a batch today for an event tomorrow. and im actually using donut holes for the pops.. any suggestions on how to get them to roll properly and not fall apart in the chocolate?
Stacy
December 10, 2018 at 2:19 pm (5 years ago)Ok I have a question. What is a good trick for the chocolate to not running down the stick
Linda Allen
March 27, 2019 at 10:44 pm (5 years ago)More ideas. At work we got two cake balls in a little box(only fit for 2) with ribbon sitting on desk for surprise from boss. I took box and made template. Have used scrapbooking paper for wedding showers, Aloha party where you can ad words inside top cover etc. Just from that first gift to me. These little surprise gifts of just 2 cake balls or truffles really make you feel SPECIAL. Glad to share I love, love, love this site !
Barbara
January 28, 2020 at 10:15 pm (4 years ago)I have a cake pop maker but I only use it to shape the balls! Works perfect! Never have plugged it in. And it makes 10 balls at a time. So handy and a thrift store find to boot. ?